


Deploying Secure Boot 2023 Certificates with Active Directory and Configuration Manager - A Step-by-Step Walkthrough

The companion article Secure Boot Certificates Expire in June 2026 - Cut Through the Noise, Here Is What to Do covers the what and why of the Secure Boot certificate expiration. This walkthrough covers the how for environments running Active Directory and Microsoft Configuration Manager (MECM/SCCM). Every step described here was tested and validated in a production health care environment. No theory, no hypotheticals, just what was done, in order.
Step 1: Extend Hardware Inventory to Collect Secure Boot Status
Before deploying anything, you need to know where your fleet stands. Configuration Manager does not collect Secure Boot certificate status out of the box. The relevant data lives across three registry paths on each device:
HKLM\SYSTEM\CurrentControlSet\Control\SecureBoot(parent key: AvailableUpdates, opt-in/opt-out settings)HKLM\SYSTEM\CurrentControlSet\Control\SecureBoot\State(UEFISecureBootEnabled)HKLM\SYSTEM\CurrentControlSet\Control\SecureBoot\Servicing(UEFICA2023Status, error codes, confidence level)
To bring all of this into ConfigMgr hardware inventory, add a custom MOF block to configuration.mof on the site server. The file is located at:
<ConfigMgr Install Path>\inboxes\clifiles.src\hinv\configuration.mof
Open it in an elevated text editor and paste the following at the bottom of the file:
//========================
// Secure Boot Certificate Status (Full)
//========================
#pragma namespace ("\\\\.\\root\\cimv2")
#pragma deleteclass("SecureBootStatus", NOFAIL)

[DYNPROPS]
class SecureBootStatus
{
    [key] string KeyName;

    // Parent: SecureBoot
    uint32 AvailableUpdates;
    uint32 HighConfidenceOptOut;
    uint32 MicrosoftUpdateManagedOptIn;

    // Subkey: SecureBoot\State
    uint32 UEFISecureBootEnabled;

    // Subkey: SecureBoot\Servicing
    string UEFICA2023Status;
    string UEFICA2023Error;
    string UEFICA2023ErrorEvent;
    string ConfidenceLevel;
    string BucketHash;
    uint32 WindowsUEFICA2023Capable;
};

[DYNPROPS]
instance of SecureBootStatus
{
    KeyName = "SecureBoot_Status";

    // Parent: HKLM\SYSTEM\CurrentControlSet\Control\SecureBoot
    [PropertyContext("local|HKEY_LOCAL_MACHINE\\SYSTEM\\CurrentControlSet\\Control\\SecureBoot|AvailableUpdates"), Dynamic, Provider("RegPropProv")]
    AvailableUpdates;

    [PropertyContext("local|HKEY_LOCAL_MACHINE\\SYSTEM\\CurrentControlSet\\Control\\SecureBoot|HighConfidenceOptOut"), Dynamic, Provider("RegPropProv")]
    HighConfidenceOptOut;

    [PropertyContext("local|HKEY_LOCAL_MACHINE\\SYSTEM\\CurrentControlSet\\Control\\SecureBoot|MicrosoftUpdateManagedOptIn"), Dynamic, Provider("RegPropProv")]
    MicrosoftUpdateManagedOptIn;

    // Subkey: SecureBoot\State
    [PropertyContext("local|HKEY_LOCAL_MACHINE\\SYSTEM\\CurrentControlSet\\Control\\SecureBoot\\State|UEFISecureBootEnabled"), Dynamic, Provider("RegPropProv")]
    UEFISecureBootEnabled;

    // Subkey: SecureBoot\Servicing
    [PropertyContext("local|HKEY_LOCAL_MACHINE\\SYSTEM\\CurrentControlSet\\Control\\SecureBoot\\Servicing|UEFICA2023Status"), Dynamic, Provider("RegPropProv")]
    UEFICA2023Status;

    [PropertyContext("local|HKEY_LOCAL_MACHINE\\SYSTEM\\CurrentControlSet\\Control\\SecureBoot\\Servicing|UEFICA2023Error"), Dynamic, Provider("RegPropProv")]
    UEFICA2023Error;

    [PropertyContext("local|HKEY_LOCAL_MACHINE\\SYSTEM\\CurrentControlSet\\Control\\SecureBoot\\Servicing|UEFICA2023ErrorEvent"), Dynamic, Provider("RegPropProv")]
    UEFICA2023ErrorEvent;

    [PropertyContext("local|HKEY_LOCAL_MACHINE\\SYSTEM\\CurrentControlSet\\Control\\SecureBoot\\Servicing|ConfidenceLevel"), Dynamic, Provider("RegPropProv")]
    ConfidenceLevel;

    [PropertyContext("local|HKEY_LOCAL_MACHINE\\SYSTEM\\CurrentControlSet\\Control\\SecureBoot\\Servicing|BucketHash"), Dynamic, Provider("RegPropProv")]
    BucketHash;

    [PropertyContext("local|HKEY_LOCAL_MACHINE\\SYSTEM\\CurrentControlSet\\Control\\SecureBoot\\Servicing|WindowsUEFICA2023Capable"), Dynamic, Provider("RegPropProv")]
    WindowsUEFICA2023Capable;
};
Save the file. The site server monitors configuration.mof for changes and compiles it automatically. Verify successful compilation in dataldr.log on the site server. Look for:
Configuration.Mof change detected
Successfully updated configuration.mof in the database.
End of cimv2\sms\inv_config-to-policy conversion; returning 0x0
No errors, no red lines. The class definition is now staged for client distribution.
Step 2: Enable the Class in Hardware Inventory Client Settings
The MOF compilation makes the class available, but it is not collected until you enable it in client settings.
- Open the ConfigMgr console. Navigate to Administration > Client Settings.
- Open Default Client Settings (or your custom device client settings policy).
- Click Hardware Inventory on the left, then Set Classes.
- Click Add > Connect.
- Point it at a machine that has already received a policy refresh since the MOF change (the site server itself works if it is a ConfigMgr client).
- Find
SecureBootStatusin the class list, check the box, and confirm all properties are selected. - OK out of everything.
Trigger a machine policy refresh and hardware inventory cycle on a test device:
Invoke-WMIMethod -Namespace "root\ccm" -Class SMS_Client -Name TriggerSchedule -ArgumentList "{00000000-0000-0000-0000-000000000001}"
Start-Sleep -Seconds 30
Invoke-WMIMethod -Namespace "root\ccm" -Class SMS_Client -Name TriggerSchedule -ArgumentList "{00000000-0000-0000-0000-000000000101}"
After the inventory cycle completes, verify the data in Resource Explorer on the test device. Under Hardware > SecureBootStatus, the values should be populated: UEFISecureBootEnabled, UEFICA2023Status, AvailableUpdates, ConfidenceLevel, and the rest.
Step 3: Build Device Collections
With inventory data flowing, create two collections to track the rollout.
Collection 1: Secure Boot Certificate Update Needed or Unknown
This collection catches devices where the update is not complete AND devices that have not reported inventory yet. The LEFT JOIN with IS NULL handles both cases.
SELECT SMS_R_System.ResourceID, SMS_R_System.ResourceType,
    SMS_R_System.Name, SMS_R_System.SMSUniqueIdentifier,
    SMS_R_System.ResourceDomainORWorkgroup, SMS_R_System.Client
FROM SMS_R_System
LEFT JOIN SMS_G_System_SecureBootStatus
    ON SMS_G_System_SecureBootStatus.ResourceID = SMS_R_System.ResourceID
WHERE SMS_G_System_SecureBootStatus.UEFICA2023Status != 'Updated'
OR SMS_G_System_SecureBootStatus.UEFICA2023Status IS NULL
Collection 2: Secure Boot Certificate Update Complete
SELECT SMS_R_System.ResourceID, SMS_R_System.ResourceType,
    SMS_R_System.Name, SMS_R_System.SMSUniqueIdentifier,
    SMS_R_System.ResourceDomainORWorkgroup, SMS_R_System.Client
FROM SMS_R_System
INNER JOIN SMS_G_System_SecureBootStatus
    ON SMS_G_System_SecureBootStatus.ResourceID = SMS_R_System.ResourceID
WHERE SMS_G_System_SecureBootStatus.UEFICA2023Status = 'Updated'
As the rollout progresses, the first collection shrinks and the second grows. That is the progress tracker.
WQL does not support comments. Do not add any inline comments to collection queries.
Step 4: Deploy the ADMX Templates and Create the GPO
The Secure Boot Group Policy settings are not included in the original V1.0 ADMX release for Windows 11 25H2 (September 2025). They were added in V2.0 (October 2025). The current version is V3.0 (February 2026). Download the correct version:
Administrative Templates (.admx) for Windows 11 2025 Update (25H2) - V3.0
Run the MSI to extract the files. Copy SecureBoot.admx and en-US\SecureBoot.adml into the Central Store:
\\yourdomain.com\SYSVOL\yourdomain.com\Policies\PolicyDefinitions\SecureBoot.admx
\\yourdomain.com\SYSVOL\yourdomain.com\Policies\PolicyDefinitions\en-US\SecureBoot.adml
Open Group Policy Management, create a new GPO, and navigate to:
Computer Configuration > Policies > Administrative Templates > Windows Components > Secure Boot
Enable "Enable Secure Boot Certificate Deployment." This single setting triggers the entire multi-step certificate update process on targeted devices. It sets the AvailableUpdatesPolicy registry value to 0x5944, which tells the Windows scheduled task (\Microsoft\Windows\PI\Secure-Boot-Update) to write the 2023 certificates from disk into the UEFI firmware variables. The certificates are already on disk from previous cumulative updates. No additional patching is needed after the GPO is applied.
Leave the other two settings at Not Configured. Specifically, do not enable "Automatic Certificate Deployment via Updates," as the naming is misleading. Enabling that setting actually blocks automatic deployment through cumulative updates by setting the HighConfidenceOptOut flag. Not Configured leaves it active as a secondary deployment path.
Link the GPO to a test OU first. Validate on representative hardware before expanding to production OUs.
Step 5: Create a BitLocker Safety Net with a Compliance Baseline
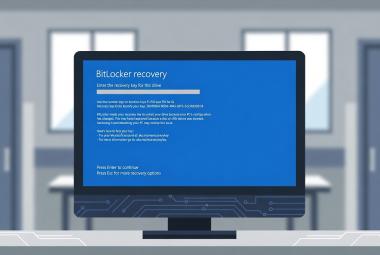
The certificate update process writes new certificates to UEFI firmware variables and then replaces the Windows boot manager on the next reboot. That boot manager replacement changes the boot chain measurements that BitLocker validates, which can trigger a BitLocker recovery prompt. On a nursing station or a clinical workstation in an exam room, a recovery key prompt is a patient care disruption.
To prevent this, create a Configuration Item that detects devices in the active update window and automatically suspends BitLocker before the reboot completes the process.
Detection Script (PowerShell):
$Status = (Get-ItemProperty 'HKLM:\SYSTEM\CurrentControlSet\Control\SecureBoot\Servicing' -Name 'UEFICA2023Status' -ErrorAction SilentlyContinue).UEFICA2023Status
$BLStatus = (Get-BitLockerVolume -MountPoint "C:" -ErrorAction SilentlyContinue).ProtectionStatus

If ($Status -eq "InProgress" -and $BLStatus -eq "On") {
    Write-Host "Non-Compliant"
    Exit 1
} Else {
    Write-Host "Compliant"
    Exit 0
}
Remediation Script (PowerShell):
Suspend-BitLocker -MountPoint "C:" -RebootCount 2
Compliance Rule Configuration:
- Rule type: Value
- Data type: String
- The value returned by the specified script: Equals "Compliant"
- Check "Run the specified remediation script when this setting is noncompliant"
- Uncheck "Report noncompliance if this setting instance is not found"
- Noncompliance severity: None
The unchecked "report noncompliance if not found" setting is important. If the Servicing registry key does not exist, the certificate update has not started on that device and there is nothing to suspend BitLocker for. Machines without the key are safe and should not trigger remediation.
Machines that are not BitLocker-encrypted always pass the detection check because ProtectionStatus will not equal On. The baseline is safe to deploy broadly.
Create a Compliance Baseline containing this CI and deploy it to all target systems with the following settings:
- Evaluation schedule: Every 30 minutes
- Allow remediation outside maintenance windows: Yes
- Do not report noncompliance if setting instance is not found
The 30-minute cycle is aggressive enough to catch the InProgress state before a user reboots, without generating excessive load on the site server. Remediation outside maintenance windows is necessary because the suspend is non-disruptive (invisible to the user) and the risk it mitigates (recovery key prompt at a nursing station) is time-sensitive. BitLocker automatically re-enables protection after the specified number of reboots (two in this case), so the suspension is temporary and self-healing with no follow-up action required.
A note on risk: Suspending BitLocker means the drive is not encrypted-at-rest during the suspension window. That is a real security tradeoff. Your organization needs to weigh that temporary exposure against the operational risk of the alternative: devices prompting for BitLocker recovery keys at clinical workstations, nursing stations, and laptops in the field with no IT staff on site. In most health care environments, the operational disruption and patient care impact of a fleet-wide wave of recovery key prompts will outweigh the brief encryption gap from a controlled two-reboot suspension. But that is an organizational decision that should be documented in your risk analysis, not an assumption.
Step 6: Monitor and Expand
After validating on the test OU, expand the GPO to production. Monitor progress through the ConfigMgr collections built in Step 3. As devices process the update and report hardware inventory, they will move from the "needed" collection to the "complete" collection.
For quick spot-checks on individual devices, use the PowerShell one-liner:
(Get-ItemProperty 'HKLM:\SYSTEM\CurrentControlSet\Control\SecureBoot\Servicing' -Name 'UEFICA2023Status' -ErrorAction SilentlyContinue).UEFICA2023Status
"Updated" means the device is done. Event ID 1808 in the System event log provides additional confirmation. Event ID 1801 provides error details for devices that stall.
The full deployment lifecycle from GPO application to completed update is approximately 48 hours and at least one reboot per device. Across a fleet with varied reboot patterns, plan for a few weeks to reach full coverage.
Step 7: Close the Firmware Default Gap with OEM BIOS Updates
The GPO updates the active Secure Boot variables in UEFI firmware, which protects the device under normal operation. But UEFI firmware also maintains a separate set of default variables stored in the firmware ROM by the manufacturer. If someone performs a factory reset in BIOS setup, those defaults are what get restored. Without an OEM BIOS update, the defaults still contain the old 2011 certificates, which creates a latent boot failure risk if a reset ever occurs after the 2023-signed boot manager is in place.
To close this gap, pull a report of hardware models present in your environment and their current BIOS versions. Configuration Manager already has this data in hardware inventory through the Win32_BIOS and Win32_ComputerSystem classes.
Then enable the third-party update catalogs built into the ConfigMgr console for each OEM represented in your fleet (Dell, HP, Lenovo, etc.). These catalogs include BIOS and firmware updates alongside driver packages. Once enabled, OEM firmware updates flow through your existing monthly software update deployment process alongside Windows cumulative updates. No separate workflow, no manual BIOS flashing, no technician walking around with USB drives.
This is the step that fully closes the factory-reset risk. The GPO handles the active variables, the OEM BIOS update handles the defaults. Both sets of variables are now carrying the 2023 certificates, and the device is protected regardless of whether someone resets UEFI to factory settings.
If your environment does not use the third-party update catalogs, the same result can be achieved by manually packaging the OEM BIOS updates as ConfigMgr applications or packages with a script-based installation. Include the BitLocker suspension in your installation script so the BIOS flash and BitLocker handling are a single deployment, and deploy it to collections based on model. For a small environment with a handful of models this is perfectly practical. Larger organizations with dozens of models across multiple OEMs will want to weigh the packaging effort against the timeline pressure and consider whether enabling the third-party catalogs is the better long-term investment, especially since those catalogs will continue delivering firmware updates for future needs well beyond this single event.
This article is for informational purposes only and does not constitute legal or compliance advice. Covered entities and business associates should consult qualified legal counsel or compliance professionals before making decisions pertaining to HIPAA or IT infrastructure.
Sources
- Microsoft, "Secure Boot Certificate updates: Guidance for IT professionals and organizations," KB 5062713, support.microsoft.com
- Microsoft, "Group Policy Objects (GPO) method of Secure Boot," KB 5068198, support.microsoft.com
- Microsoft, "Registry key updates for Secure Boot," KB 5068202, support.microsoft.com
- Microsoft, "Secure Boot troubleshooting guide," KB 5085046, support.microsoft.com
- Microsoft, "Administrative Templates (.admx) for Windows 11 2025 Update (25H2) - V3.0," microsoft.com